You need to send a fax, maybe a document, every once in a while, but not that often, so gettings a fax machine doesn’t make sense. Perhaps you never needed to fax or never had a fax machine, but you need to send a quick fax right now. In this article, I will walk you through easy methods to fax from an iPhone without requiring a fax machine.
Please note that while most of these applications are free to download, some of them might require either a one-time payment or a monthly subscription, or carrier charges. Here are the three methods that you can use to fax from an iPhone.
Quick Guide For Fax From An iPhone Or iPad In 2023
Send a fax from your iPhone or iPad in no time; you need to download the WeFax app from AppStore; after that, open the app and Add Cover Page > Add your details > tap on the “+” button > Select Scan with a camera > Add the number of the recipient > Tap on the send now and you’ll be done.
How To Fax From An iPhone? – 3 Methods
- Using the WeFax app
- Using the iFax app
- Using the FAX from the iPhone app
Send Fax Using The WeFax App From iPhone
Here are the steps to send a fax using the WeFax app:
#1: Download the WeFax app from the app store or tap here.
#2: Open the WeFax app once it’s downloaded.
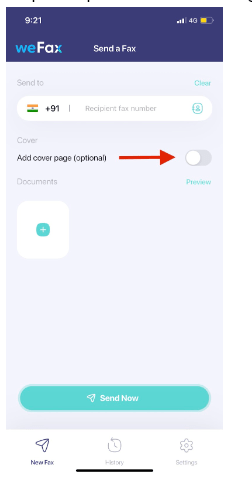
#3: Tap on “Add Cover Page”
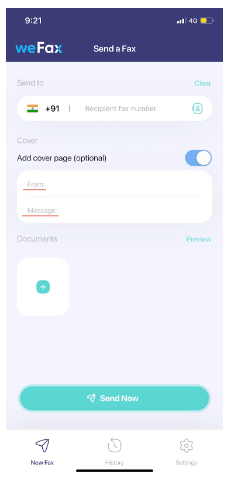
#4: Add your details: Name(From), Subject, and messages in respective fields.
#5: To add a document from the camera, tap on the “+” button under the “Documents” title.
#6: Select the “Scan with a camera” option.
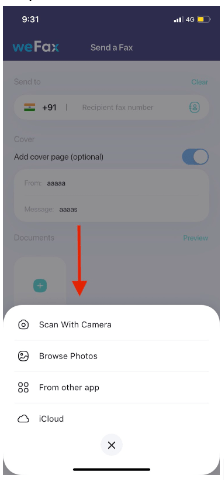
#7:
will automatically crop the document; if you want to edit the crop, you can do it by adjusting the dots on the four corners and using the magnifying glass for precise movements.
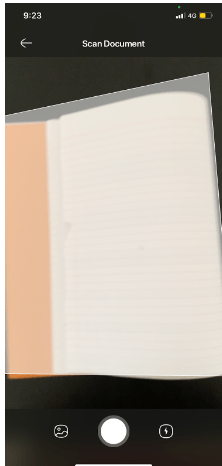
Note: You can also add photos from your photo library or cloud by tapping on the ”+” button under “Documents.”
#8: Add the number of the recipient by tapping on the bar at the top.
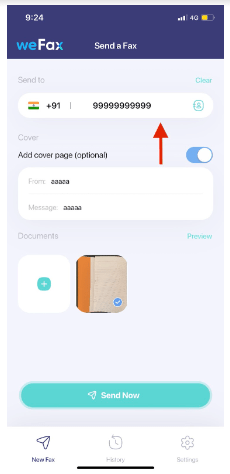
#9: Tap on the “send now” button.
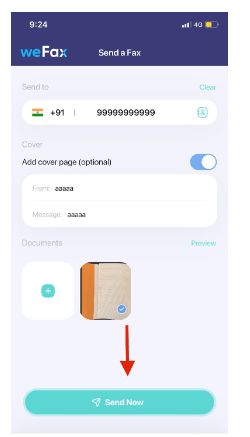
Your Fax will be sent.
Make Fax Using The iFax App From iPhone
Here are the steps to send a fax using the iFax app:
#1: Download the iFax app from the app store or tap here.
#2: Launch the app once it’s downloaded.
Note: You can use the app for free for one week; after that, there is a monthly subscription. You can check the pricing by tapping on “Pricing” in the top left corner.
#3: Tap on “New Fax” in the top right corner.
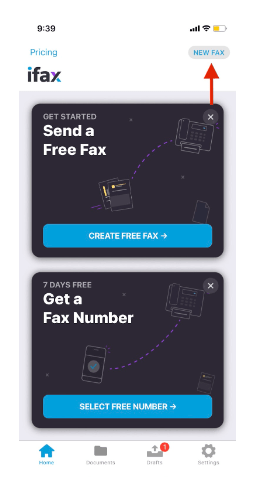
#4: Add the recipient number.
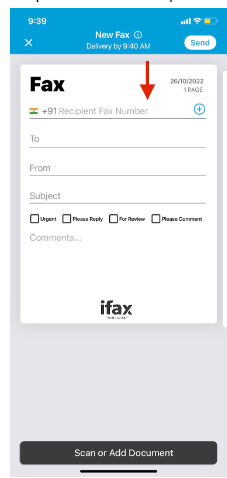
#5: Add the recipient’s name, your name, and the subject in the respective fields.
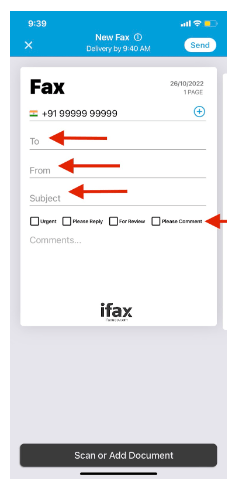
#6: Select options for urgency, reply, etc.
#7: Add a comment if required.
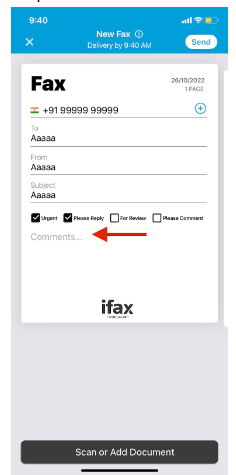
#8: Tap on “Scan or Add Documents.” You can use the camera to scan the documents, or you can upload documents from photos, mail, files, or the cloud. You can also create a document by selecting the “Write Text” option.
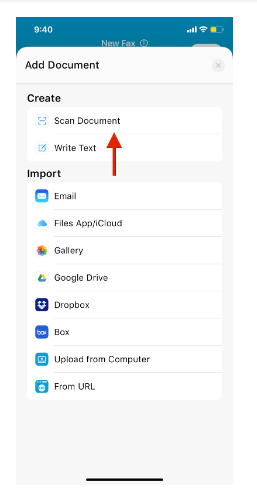
#9: Select the Scan Document option if you want to take a picture of the document.
#10: Place the camera of your iPhone right above the document, and it will automatically click the picture.
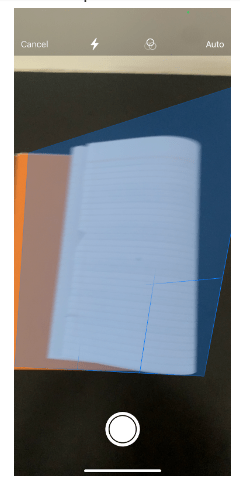
#11: Tap on “save” in the bottom right corner.
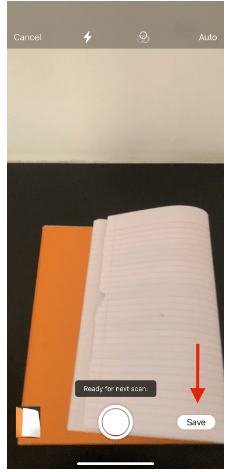
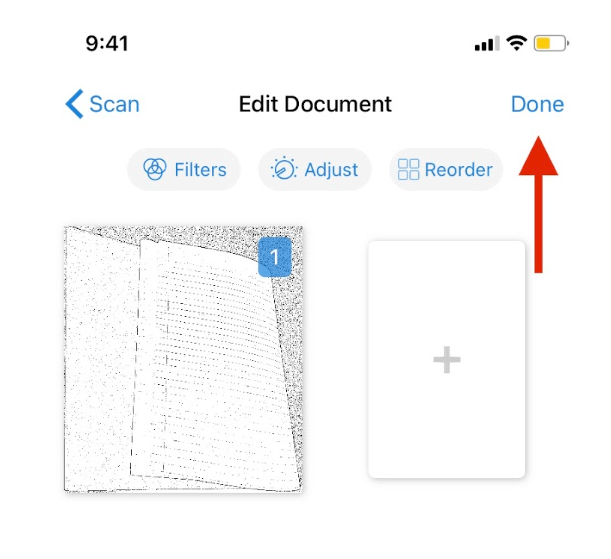
#12: Tap on the document picture if you want to edit it, change the filter, crop, etc.
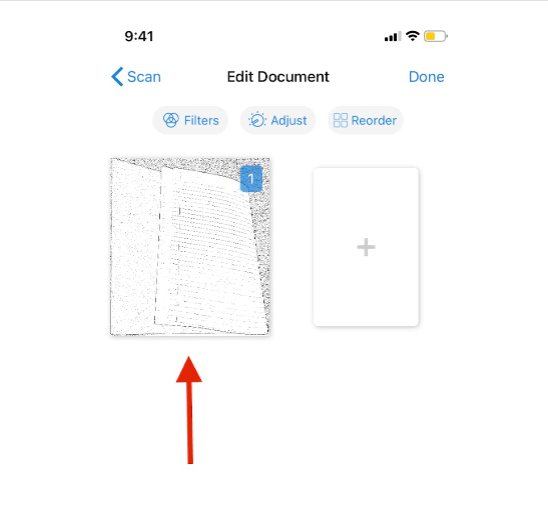
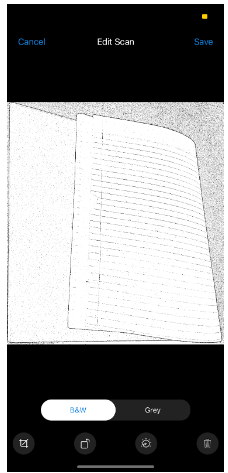
#13: Tap on “done” in the top right corner.
#14: Tap on “Send” in the top right corner.
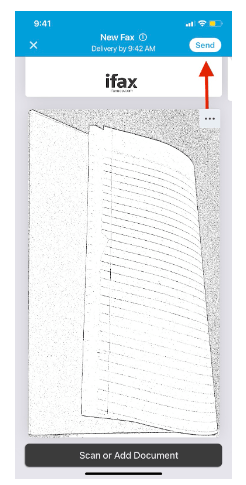
Your fax will be sent.
Using The Fax From The iPhone App
Here are the steps to send a fax using the Fax from iPhone app
#1: Download the “Fax from iPhone” app from the app store or tap here.
#2: Launch the app once it’s downloaded.
#3: Enter the recipient’s number under the “send to” title. You can also select a contact by tapping on the contacts icon on the right side.
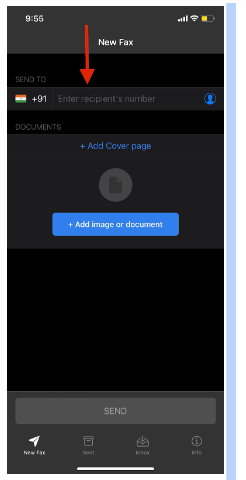
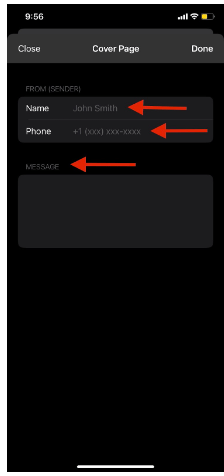
#4: Tap on the “+Add cover page” option.
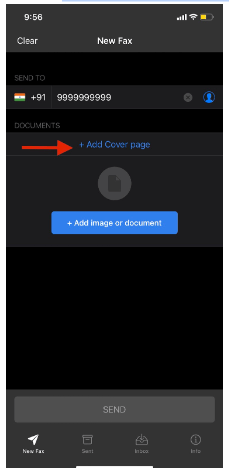
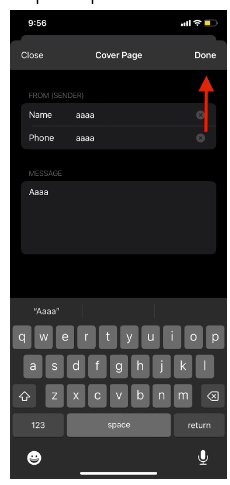
#5: Enter your name, phone number, and message.
#6: Tap on “done” in the top right corner.
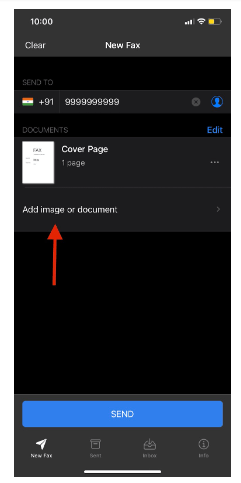
#7: Select the “+ Add image or document” option. You can scan documents from the camera and upload documents from photos or the cloud.
#8: Tap on the “scan documents” option if you want to scan documents from the camera.
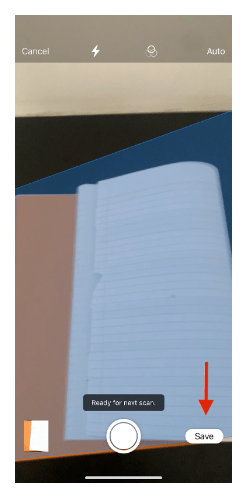
#9: Place the camera of your iPhone above the document, and it will automatically take a picture.
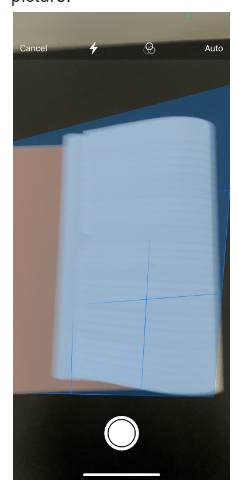
#10: Tap on the “save” button in the bottom right corner.
#11: Click on the send button at the bottom.
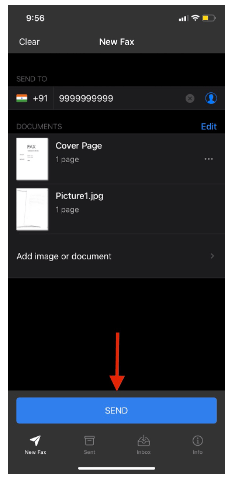
Your Fax will be sent.
Related Reads
- Tips to resolve Face ID problems on your iPhone
- How To Block A Number On iPhone?
- How to Italicize on iPhone
Conclusion: Fax From An iPhone
Hopefully, we have helped you with faxing from your iPhone. If you are looking for the easiest Fax app, we recommend you try the Fax from the iPhone app from method 3 of this article. It is easy to use; scan the document and send it; with no fancy edits.
If you are on a budget, the most affordable app from this article is iFax from method 2. Five pages are free per month; if you require more than that, it’s just $25/month for the basic plan.
FAQs
Yes, you can; 5 pages per month are free with the iFax app. Follow method 2 in this article.
No, you will require a third-party app to fax from your iPhone.
Apple does not have a first-party app for fax, but there are many apps on the App Store for fax.
No, you cannot fax from the Gmail app.

