The Apple macOS devices are known for their productivity. If you want a computer for productivity, there is nothing better in the market than a macOS device.
This is because it provides all the tools inbuilt that you might need for productivity. There is no need to download third-party apps.
One of these productivity features is a screenshot editor. In this article, you will learn how to crop a screenshot on your Mac.
Quick guide: How to crop a screenshot on Mac
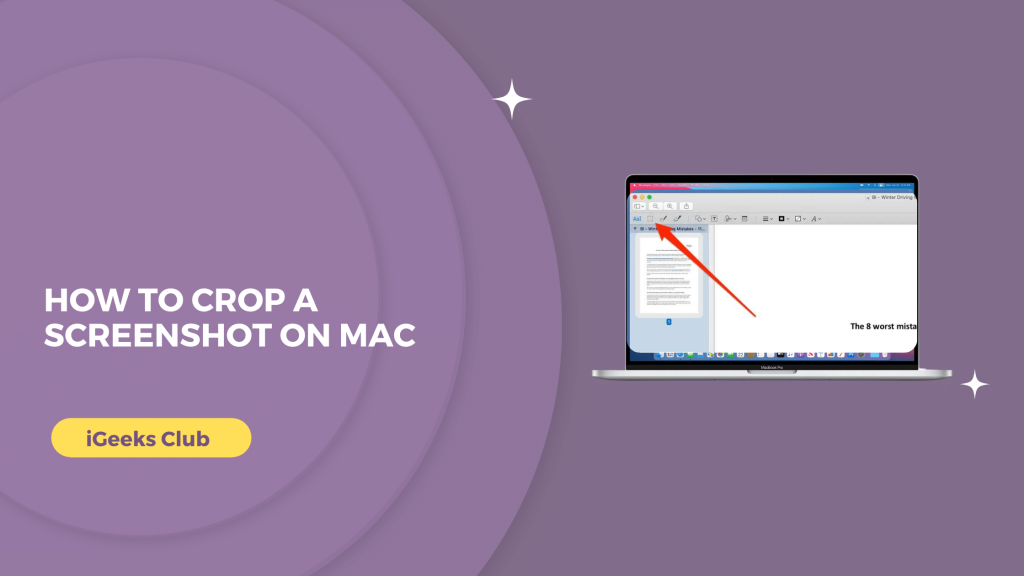
- Select the square crop button from the toolbar at the top of the window after opening a screenshot.
- Crop the screenshot by moving the four lines on the screenshot.
- Select the crop button and then click on Done.
How to crop a screenshot on Mac – Summary
- How to take a screenshot of full screen and crop
- How to take a screenshot of a selected portion of the screen
- How to take a screenshot of a window on a Mac
1. How to take a screenshot of full screen and crop
Here is a step-by-step guide on how to take a screenshot of the full screen and crop it:
- To take a screenshot of the full screen, press shift, command, and 3 at the same time on your keyboard.

- Your Mac will take a screenshot and it will appear on the bottom right-hand side for a few seconds.
- Click on that screenshot to edit it. If you did not click on the screenshot, you can edit it later. By default, the screenshots are saved on the desktop.
- Select the crop button. It’s the square button on the toolbar at the top of the window.

- Select the region by dragging the lines on each side of the screenshot.

- Select the crop button on the top toolbar.

- Select the done button.

2. How to take a screenshot of a selected portion of the screen
Here is a step-by-step guide on how to take a screenshot of a selected portion of the screen:
- To take a screenshot of a selected portion, press the shift, command, and 4 buttons at the same time.

- Your cursor will turn to a ‘+’ symbol. Hold the click button and drag your cursor to select the portion of the screen you want in the screenshot.
- Let go of the click button when you are done selecting the screen.
- You will see the thumbnail of your screenshot on the bottom right-hand side. Your screenshot will be saved to the desktop.
3. How to take a screenshot of a window on a Mac
To take a screenshot of a window on a Mac, press command, shift, spacebar, and 4 at the same time. You can also crop or edit this screenshot by clicking on the thumbnail or opening the screenshot from your desktop.

Related Reads :
Conclusion
We hope that this article has helped you with cropping screenshots on your Mac. To sum up, you crop a screenshot by opening the screenshot and clicking the square crop button at the top toolbar of the screenshot window.
You can also take a screenshot of a portion of a screen. Finally, you can also take a screenshot of a single window on your Mac.
FAQs
To capture a screenshot on a Mac, press command, shift, and 3 at the same time.
You don’t have to click to take a screenshot. Press command, shift, and 3 to take a screenshot. The thumbnail will go away in a few seconds if you don’t click it. By default, you can find the screenshot on the desktop of your Mac.
You can crop and edit a screenshot by clicking on the thumbnail which appears on the bottom right-hand side after it appears. Follow the steps in section 1 of this article for more.
If you are using a keyboard with a Windows layout, press the windows, shift, and 3 buttons on your keyboard at the same time to take a screenshot. You can also re-map these keys in settings as they suit you.